I've finally caught up with my photos since I've been in the house on the computer for the last 5 days. Check out the photos posted on Facebook of the mountain washing away and the road collapsing. I have to find a new way into town now.
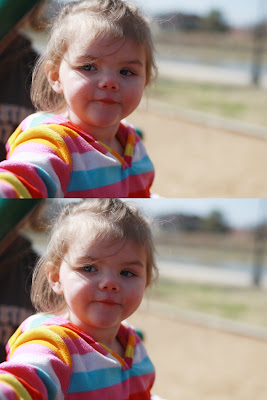
The pictures I took of Kaylee on March 6th 2011 were direct sun but she was a lot faster than me and kept getting her face in shadow. Of course if I hadn't been wearing 3 inch heels (just got out of church) I might have been able to keep up with her. But, It does make for a lot of editing after I get home.
In this picture you can see the original is much darker, first I used the marquee tool to select the Iris's hold the shift key down and draw your selection over one eye then let the shift key back up and do the same for the other eye. Hit Ctrl/J to put the iris on their own layer. I then sharpened them and adjusted the brightness a little. At this point I can still see if I've gotten a selection that was larger than the iris so I use the eraser tool and clean up the edges if needed. then I merge the layers. Now I will use the dodge tool to lighten the whites of the eye if needed, be careful not to get them too white. I went 80% on this picture and that is high. Then I adjusted curves to lighten the whole photo. If I still have not gotten the shadows light enough I will adjust the gray with the levels pallette. Removing a little of medium tone to brighten a little more then sharpen a little. This was done with Cs5.
I really need to get a monitor adjuster to make sure what I see on my monitor is what gets printed but haven't bitten the bullet yet to get one. At this point I just print a photo now and then and make adjustments by comparing the printed version to the monitor.

No comments:
Post a Comment